|
Hello Electrified Miata Fans! This will be a brief update this week as I can only write so much about ordering parts, soldering batteries and looking at couplers. The goals for last week were to do more battery soldering, work on a few software problems I observed while testing the Parameter Editor, and evaluate the fifth coupler attempt when it arrives. After four previous attempts, the fifth coupler arrived and it fits! Clearly, three strikes and you're out doesn't always apply to this situation. I had a nice big smile when pushing the coupler on to the motor. My smiled dimmed a little when I was able to get a decent picture of the fit. Here's a close up of the coupler. 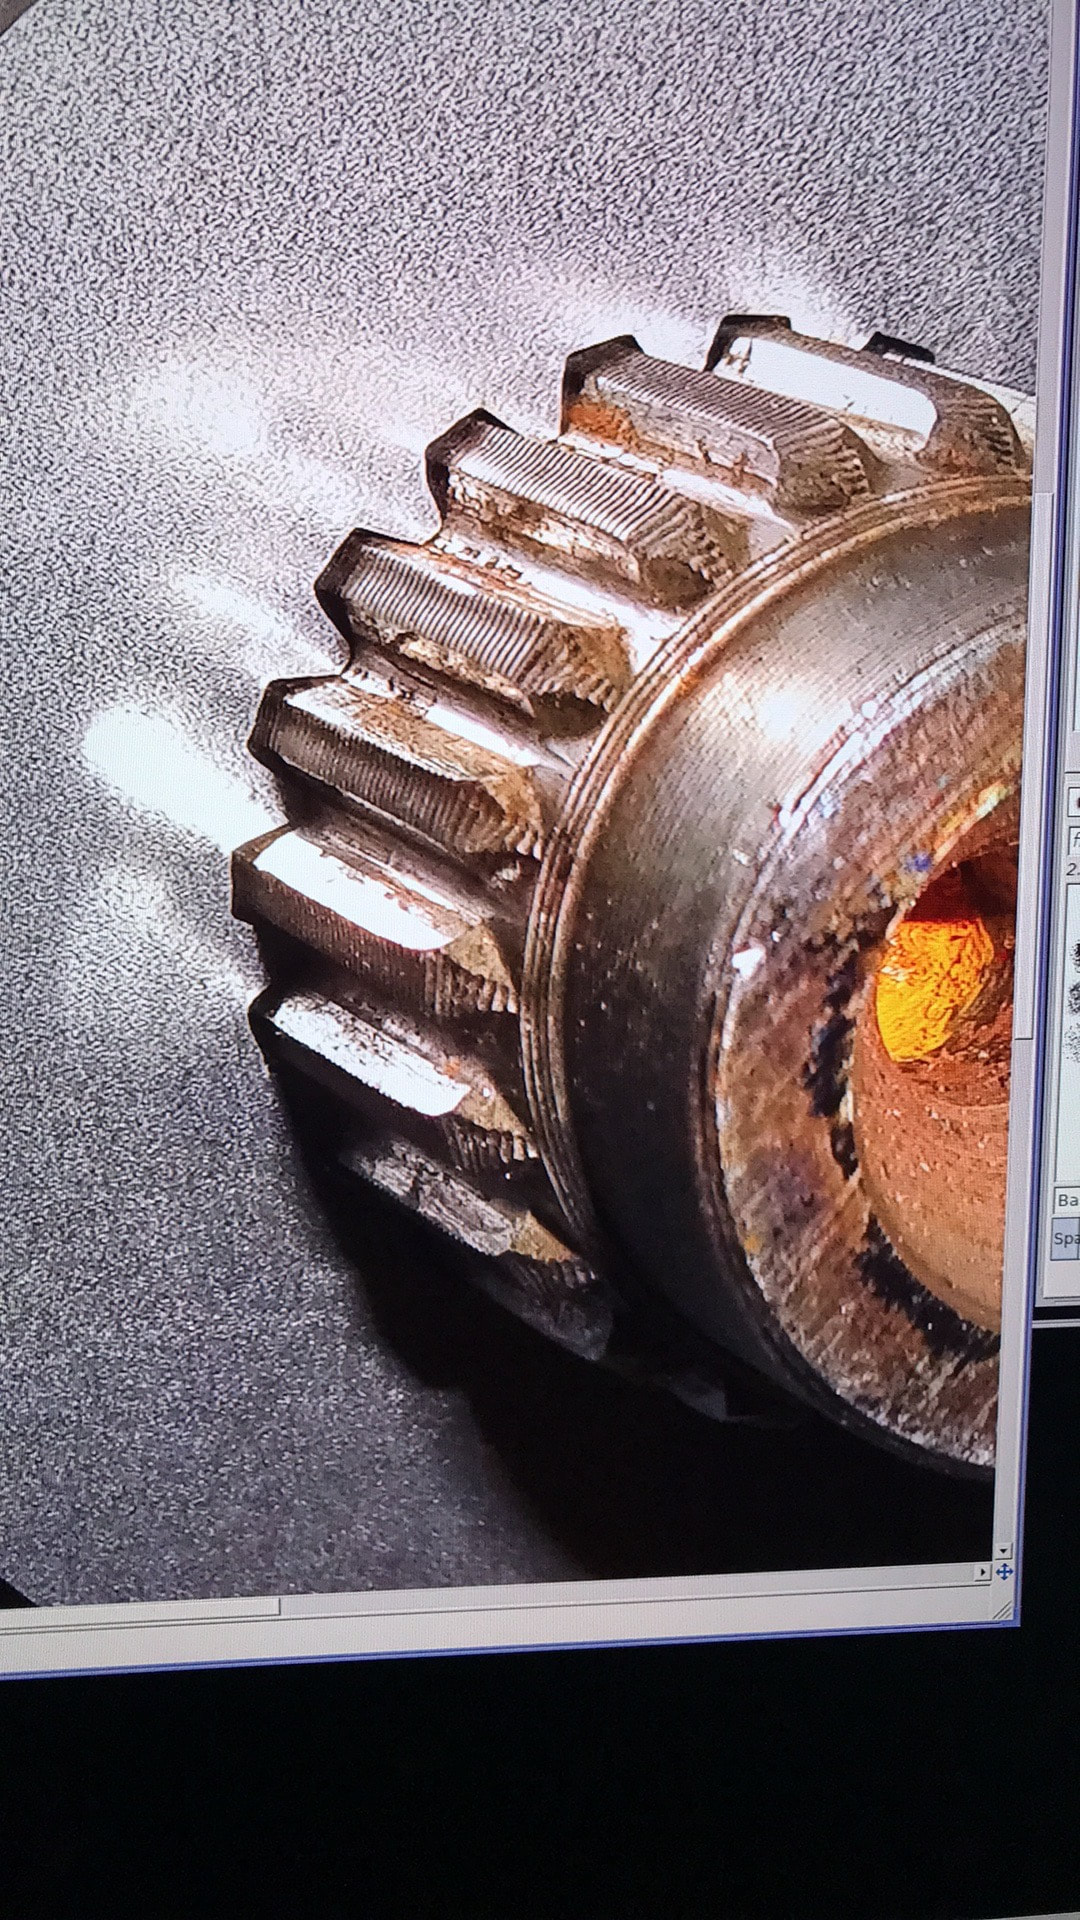 You can see there is room for improvement, and I made some adjustments to tighten the gaps around the tops of the teeth. I also learned how to put a an arc on the ends of a spline to reduce the chance of breaking the tooth. It turned out to be quite easy in freecad after watching a You-Tube. I produced another drawing and sent it off to sendcutsend. Coupler attempt number 6 will be here next week. At that point, I believe I'm ready to send off another version to eMachineshop.com and get two 'real' couplers made. Finally. I'll still continue to work with Scott for producing a version that will handle more horsepower. The version I have is not perfect, but should be good enough for the Miata prototype and much better than that Fiat clutch disk I tried. In other prototyping areas, Joe is taking our BMS boards and making multiple copies on one circuit board. This is called 'panelization'. 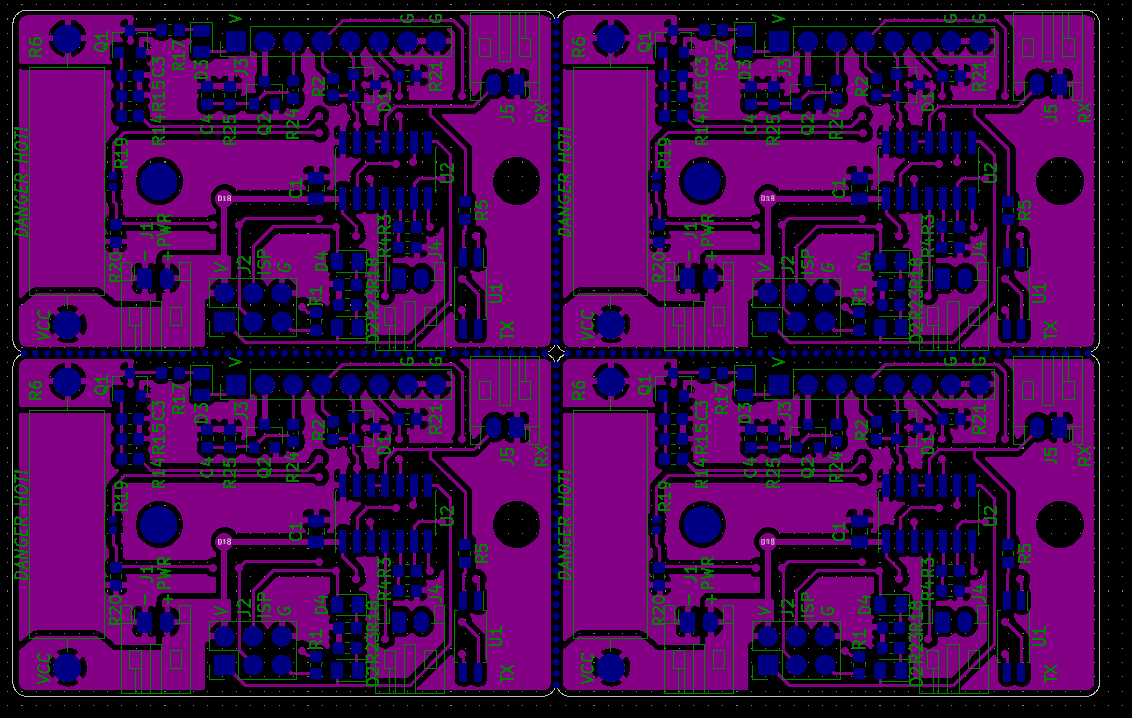 of the board at one time. Currently at JLCPCB, the limit is 30 boards, so we would need 4 separate orders to get the number of boards required. If we can put four boards on one panel, we can make one order and get all that we need. We are waiting for our current order to finish before we order a second time. Joe's design of the serial isolator board (isolates the Pi from the battery) came back and Joe tested one and it works! 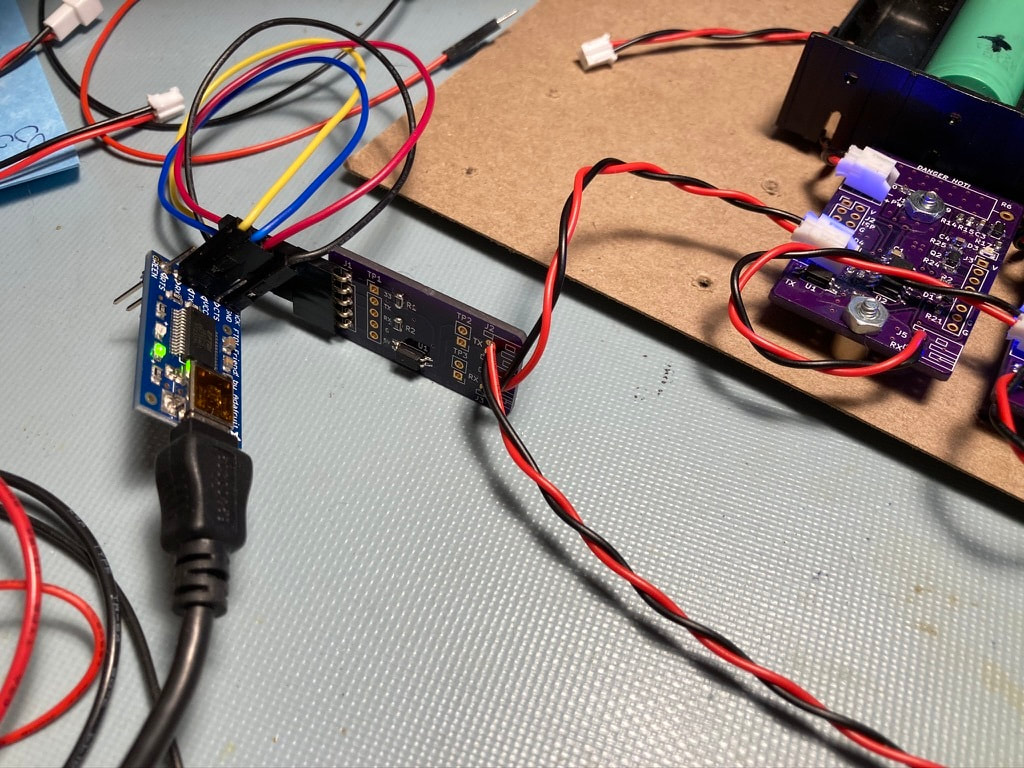 Yay Joe! I'm working on the largest battery right now and assembly is in the most tedious phase, connecting all the cell in series. One side of the battery is fully connected, which means I can start of the other side. This is when working with batteries can become dangerous. Every connection on the other side is complete so the side I'll be working is live. The voltages are initially low, but the current can be quite high as this pack is rated to put out 220 amps, probably quite a bit more in a dead short. 220 amps can be tool damaging. I'll be using plastic boards to protect myself and my tools. Wish me luck. 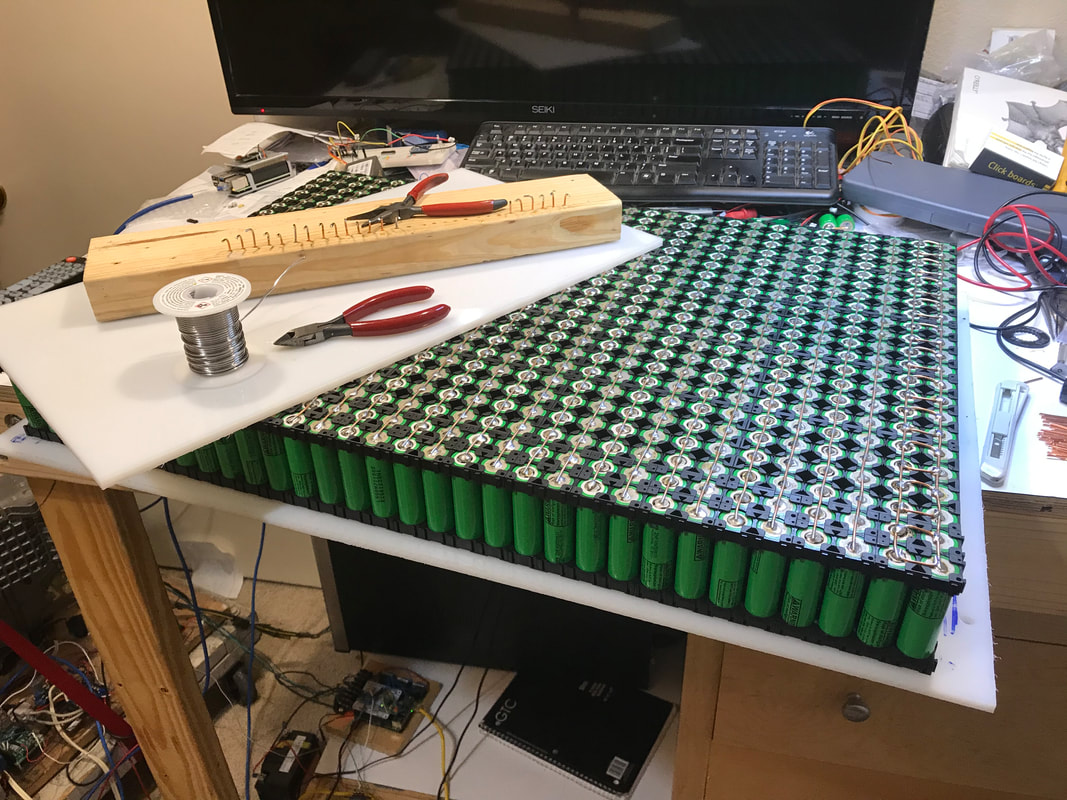 Battery soldering is somewhat boring, so to amuse myself, I performed a test of the eMiata's support laptop's battery. The laptop battery lasted 75 minutes (new supposed to be 3 1/2 hours), despite saying it had 3 minutes of charge left at the 32 minute mark. The battery in this Dell is a pouch type of battery which means I won't be able to use my 18650 cells directly. I may need to make a pack outside the laptop. I'll need to find out what voltage the charger is. I will want the laptop to
run for a longer period of time. More power! Next week will be continued work on the largest battery, evaluating the sixth coupler slice and ordering a real one! I'm sure other interesting things will happen as time permits. Wishing you health and fun! Please comment!
1 Comment
8/21/2023 07:11:36 am
Great reaading Leave a Reply. |
AuthorBill likes cars that understand the 'go fast now' pedal. Archives
May 2022
Categories |
 RSS Feed