|
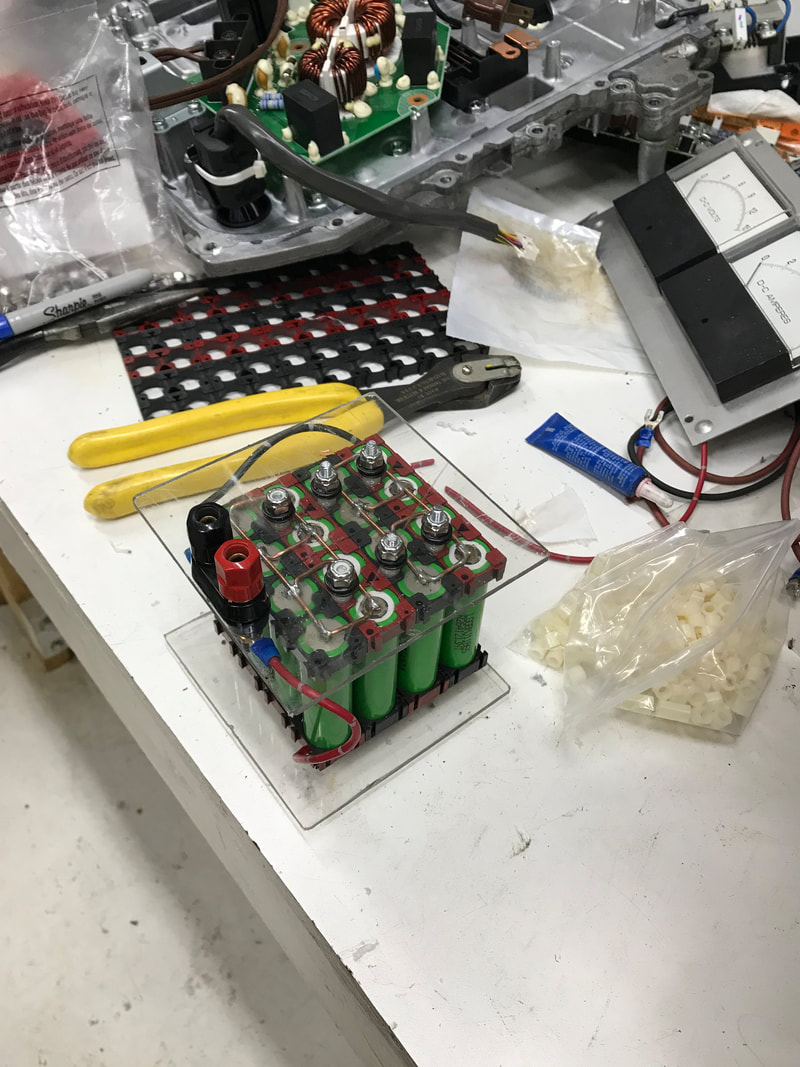
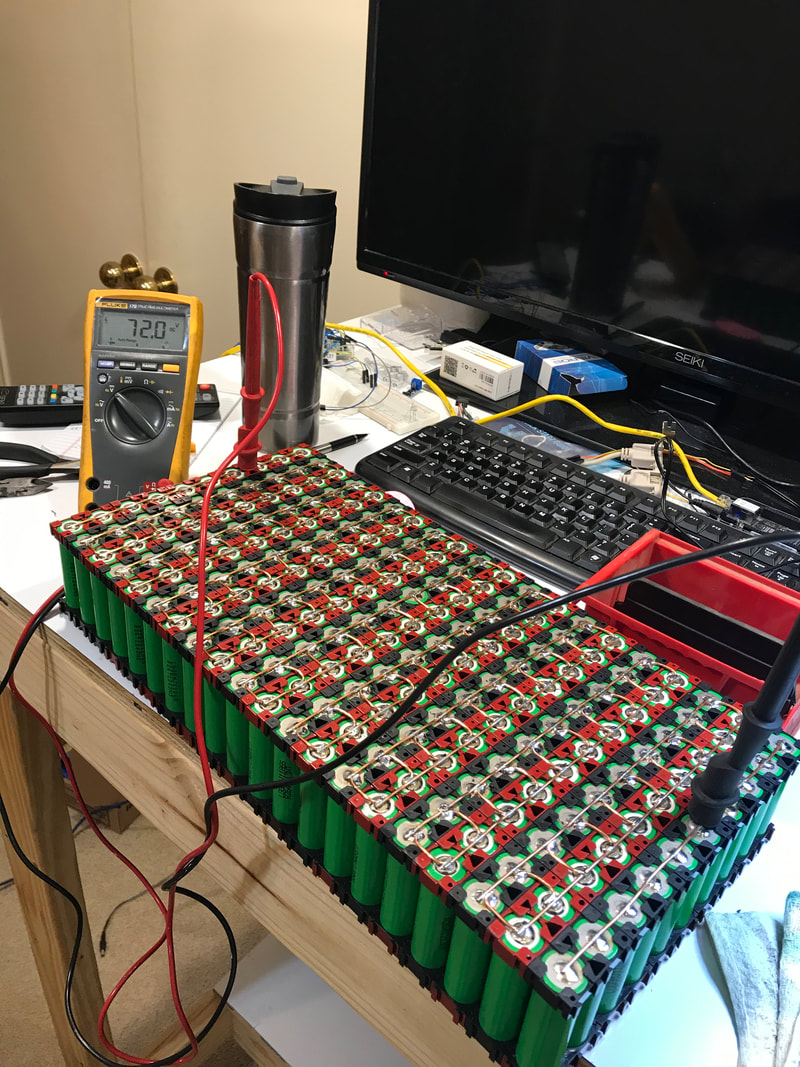
Hey Electrified Miata team, here's the latest update in the never ending quest to go faster, have fun, and be safe! For those of you following along, last week, we were going to perform more investigation on the charger, possibly assemble a BMS board and probably get our first battery pack assembled. Some things are easy while others present challenges. It seems we found some challenging aspects this week. Despite that, progress happened in many areas. Here's a peek at our test platform without motor, controller and batteries. 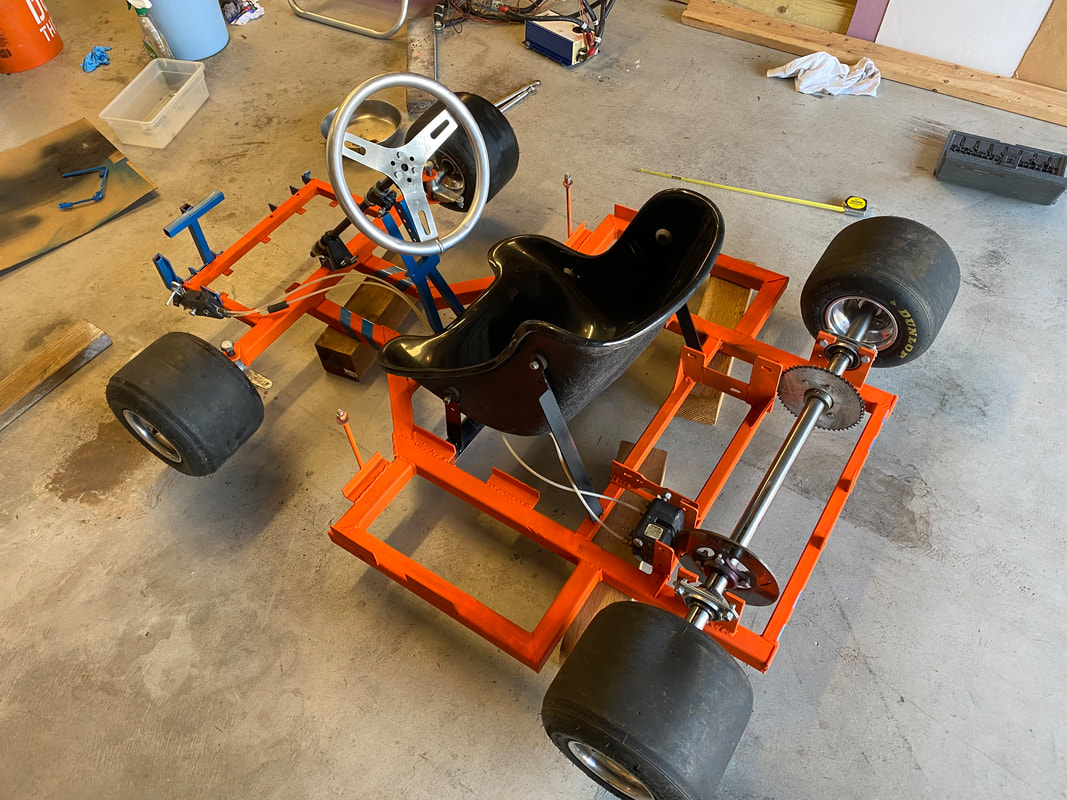 Previously, we had 180 pounds of lead acid batteries and 48 volts of power. The updated version will have 72 volts and only 100 pounds of battery. To those who love speed, this will be great fun! Before we can go fast, there are a number of details that must be addressed. Charging the batteries, finishing the go-kart, have a working BMS and assembling the batteries to name a few! As we can't go fast on a dead battery, figuring out the battery charger is high on the priority list. The Nissan Leaf charger consists of three stages. The first stage is trivial and we had that working last week. This week we focused on the second stage. After some investigation we found the spec sheet for one of the main chips (TI UCC28070) which informed us that this charger is ONLY suited to run on full voltage. This will be useful for a full 96 cell pack, but not for our first intermediate stage 20 cell packs. Using the Leaf charger will have to be shelved until will have a full 96 cell pack. We still need a way to charge our current packs, but we'll have to come up with a plan B. Of course we can't go anywhere without the go-kart being re-assembled. Bruce has been working steadily on the go-kart in the background. He has reinforced the brake caliper holders, increased our margin of safety on the steering hardware, re-aligned the brake pedal and has a plan to keep the pedal and the master cylinder lever in sync. He also stripped the cart of rust, painted it and is well along the way of re-assembling it. We are so lucky to have a wide set of skills, like welding on our team. Way to go Bruce! We also made great progress on the BMS. Joe had both the parts and boards together in one place, so he took the time to assemble them and produced our first out of one hundred BMS boards. 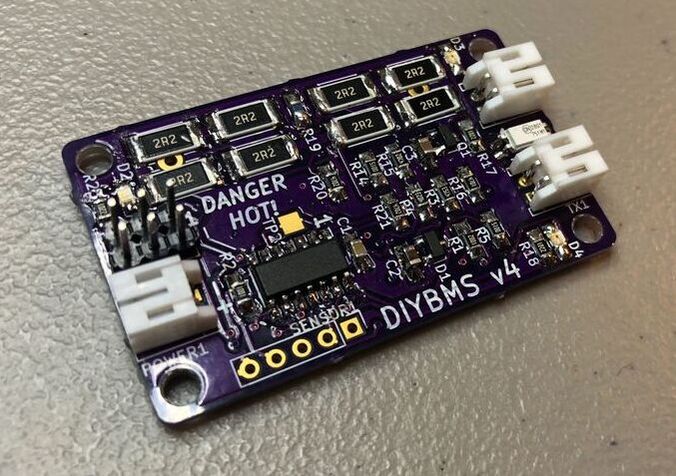 Joe reports that assembly went easier than he thought, but there was a learning curve on which pieces to place and solder first. Surprisingly, some of the LED's where the toughest parts to add as they have a specific orientation and small connections points. Once assembled, there were a few challenges in testing too. Joe reported the first board appeared to be working, but at 600 baud, eight times slower than it should. Programming the micro-controller fuses (which are separate from the program that runs on the micro) took care of that issue. I didn't even know that these processors had 'fuses'. The great google machine machine shows me something like this. Again, we are so lucky to have a wide range of skills on our team. Nice work Joe! Now that we have a BMS board, it would be great to have a fully assembled battery to monitor. I got the mini-pack assembled , although it needs a fuse which I will add next week. Thanks to Dad for the connectors. The mini-pack will run our raspberry pi's and other low voltage items. We also got the first of four main battery packs soldered, shown below reading exactly 72.0 volts! How often does that happen?
Plastic for the protective covers was cut last week but wiring the bus bars to the pack proved to be the challenge. The thought was to drill small holes, and run the connecting wires through them, soldering them on the backside. However, drilling small holes in copper is tougher than it looks, because copper is a softer metal. This means that standard drill bits are too aggressive for use with copper. Practically, it ends up breaking small drill bits, often in the bar. We tried using my hand drill press and then Bruce tried on a regular drill press resulting in partial holes and broken drill bits. After searching on google, we found that this is normal for small sized holes in copper. I now have some shop time scheduled at Ed's to where we can make some duller bits to deal with this. We were so close to having one main pack assembled, but still so far away.
When I showed the team our first battery, something pretty strange happened. First Joe started touching the battery, one side on each hand in a deliberate way to feel the tingle of electricity. We tried to convince him that running the current directly through his heart was a bad idea. He stopped by the time he got to 50 volts. Bruce then decided it would be okay to try this on one hand by touching the far end of the battery with his elbow and inching his way up the voltage chain, like playing a piano. He got all the way to 72 volts without feeling it. I’ve been shocked with as little as 48 volts and had no desire at all to touch 72 volts. I can only conclude that all the times I shocked Bruce as a young kid with a old crank telephone generator desensitized him, or he had dry skin that day. You decide. I love working with this team! They keep it real and fun! Next week, we'll attempt to manually charge the pack using a variac and careful monitoring, and find a way to drill holes in the bus bars so we can finish assembling our first battery pack. While the go-kart will need all four packs to enable 100 percent power, we will be able to do some limited testing with just one pack assembled. Stay tuned and thanks again for reading. It's not too late to join us for the fun - contact me (using this link if you don't have my number)
0 Comments
Leave a Reply. |
AuthorBill likes cars that understand the 'go fast now' pedal. Archives
May 2022
Categories |
 RSS Feed